Back to Event Manager Main Menu
Users and Roles
The Users and Roles page lets you manage user access and roles on your sites. This includes the ability to view and edit users information and their respective roles on a single page. *Note: This new page is a redesign of the previous Users page.
To access the Users and Roles page:
-
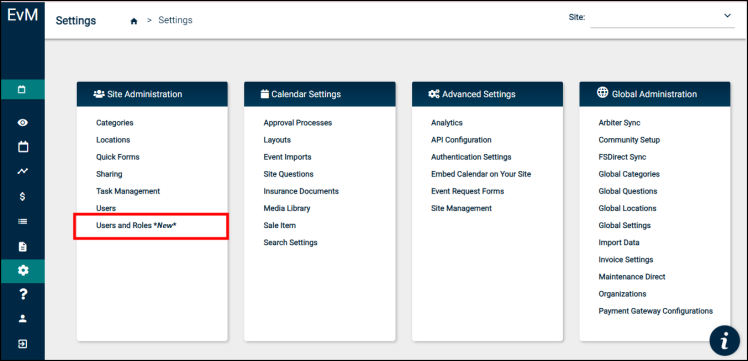
Click Settings (
 ) on your navigation menu.
 -
Select Users and Roles under Site Administration.
-
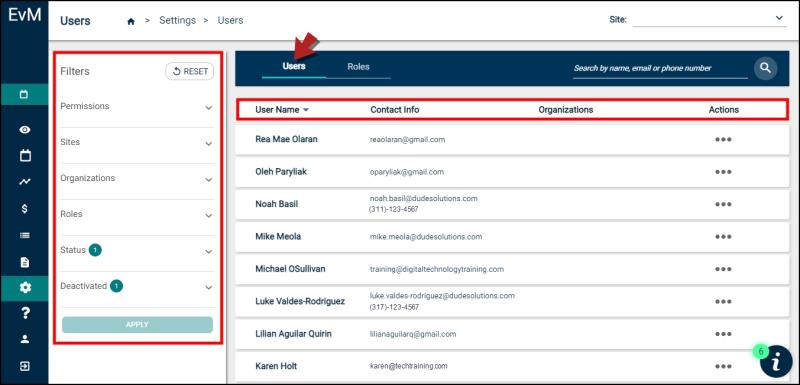
Choose the tab you wish to work on. Navigating to the Users tab allows you to view users’ details, such as their names, email addresses, phone numbers, organization, roles, or permissions while the Roles tab will help you view and filter existing roles. *Note: This page aims to simplify user interaction and enhance usability over the original Users page. It allows users who have access to Tenant and/or Site Administrators to review information about users and roles on a single page.
The Users Tab
The Users tab shows a list of all users with access to the system, regardless of their sites or permissions. You can access the information of existing users to make changes as needed. *Note: Currently, the Users tab does not allow adding new users. You need to go to the original Users page under Site Administration in Settings to add a new user.
Adding a User
-
Click on Settings in the left navigation panel.
-
Click on Users and Roles *New* in the Site Administration section.
-
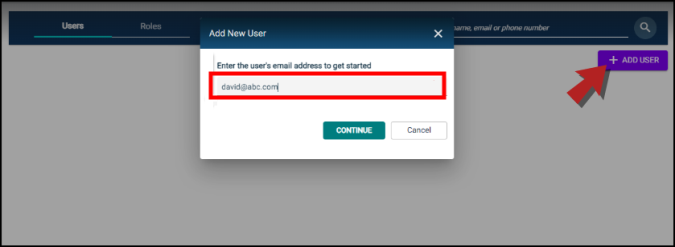
Click on the Add User button on the top right side.
-
Add a valid email address for the required user in the dialogue box on screen.
-
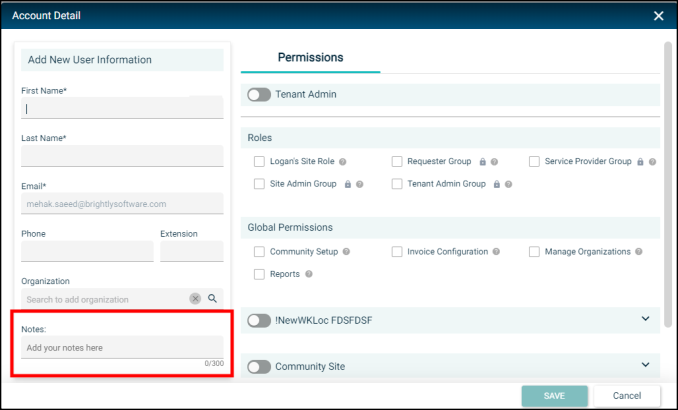
Add user details and grant permissions based on the user role.
Here are a few things to note when adding a user:
-
The email address you add must be complete and have a proper domain association.
-
The First Name and Last Name fields are mandatory to create a user profile.
-
The system will consider the user a visitor if you don't assign them any roles or permissions.
-
There are no changes to the Edit User functionality and it works the same as before.
-
You can use the Notes field to add any additional information regarding the user. *Note: The information in the Notes field is for internal use and visible only to Tenant Admins and admins with users and roles management permissions .
-
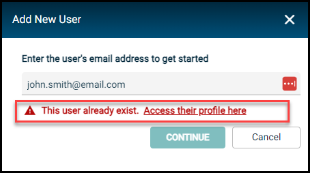
You will see an error on screen if you try to add a user that already exists in the system. You'll get a hyperlink to their existing profile which you can use to make changes, irrespective of their profile status.
Viewing and editing user information
-
Navigate these columns to view or edit user information:
-
User Name: This column displays the list of users based on the registered first and last names.
-
Contact Info: This column displays the user's registered email address and phone number.
-
Organizations: This column displays the number of organizations affiliated with the user, showing only the first organization added, while the other organizations appear as a count that includes the one displayed.
-
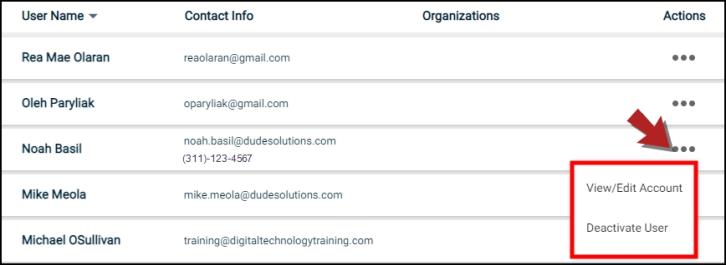
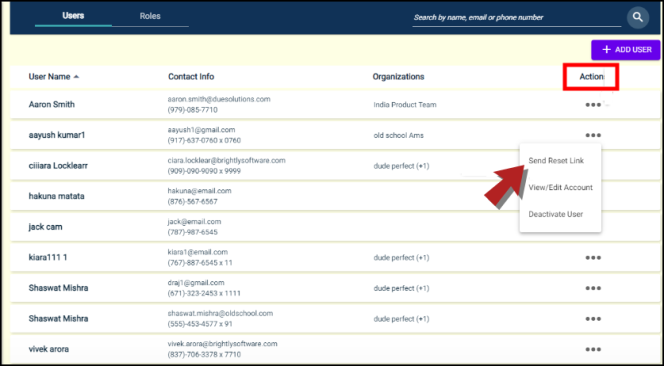
Actions: Clicking on the ellipsis button under the Actions column will provide additional options to View/Edit Account and Deactivate a user.
Bright Idea:Alternatively, the administrator can navigate to the Actions column to immediately change the targeted user information. Click the ellipsis button to open the View/Edit Account option. You can also use this column to reach the Deactivate User option faster. *Note: You are not allowed to change an SSO user's first name, last name, or email address. However, you can still add or edit their phone number and extension via the Actions column.
-
-
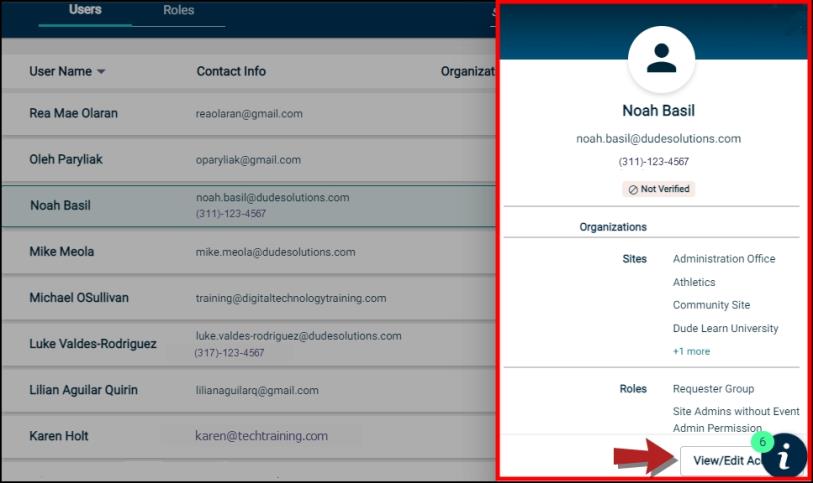
Sort the users using the arrow next to User Name. Then, choose the user you wish to view or edit. A profile card will appear on your right for a quick view. *Note: The profile card displays their name, email address, organizations, sites, and roles.
-
Click the View/Edit Account button on the user's profile card to open the Account Detail form. *Note: There are two sections in the form, which are Edit User Information and Permissions. Go to the Permissions section if you want to edit the user's Global Permissions.
-
Use the Edit button next to the username to start making changes.
-
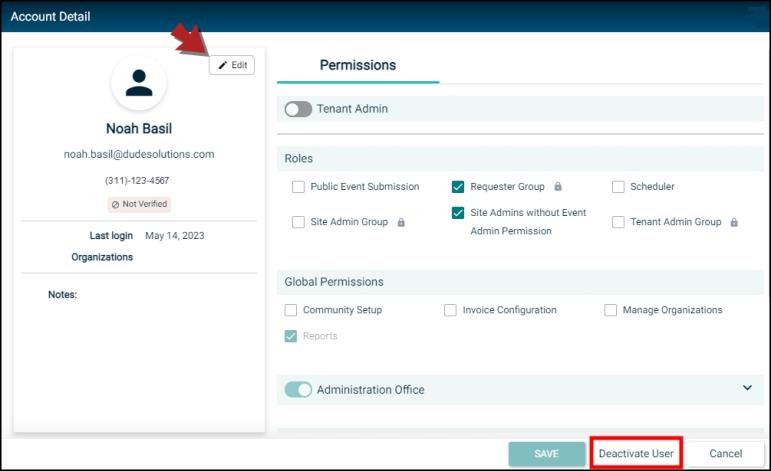
If you wish to deactivate the user, click the Deactivate User button at the bottom. *Note: Administrators are also able to re-activate deactivated users when needed. Click the ellipsis button in the Actions column to restore the user's last saved roles, permissions, and access levels.
-
The Edit User Information section allows you to edit the user’s first name, last name, email, and phone number of non-SSO users, other than adding organizations and notes to the profile. Click Save when you are done. *Note: Administrators, however, are not able to change the first name, last name, or email address of a user who registered via SSO login.
-
-
Use the Search and Filter options to find or show specific users:
-
Reset the filter menu from the previous use.
-
Use Permissions to search by permission type. You can select more than one option. It lets you choose all permissions from the Global Permissions section. *Note: You may use the No Permission filter type to see a list of users without assigned privileges or the Tenant Admin filter type to view the list of users with tenant admin access.
-
Narrow your search by user Sites. You can select more than one option here.
-
Use the Organizations or Roles filters by using the search bar or checking the available options.
-
The Status filter narrows your search by user account status. Choose either All, Verified Accounts, or Unverified Accounts.
-
You can use Deactivated to include or exclude deactivated users in your search. You can also use this filter to find only deactivated users. *Note: You are only able to view deactivated users when this filter is selected.
-
Click Apply to populate your search.
*Note: At the moment, users are not able to filter their search to find visitors on the new Users and Roles page. Please go to the original Users page instead to find your visitors.
-
Sending a password reset link
The Tenant Admins can send a reset password link to users with verified emails.
-
Click on Settings in the left navigation panel.
-
Navigate to Users and Roles in the Site Administration section.
-
Click on the required user's name to reveal user details.
-
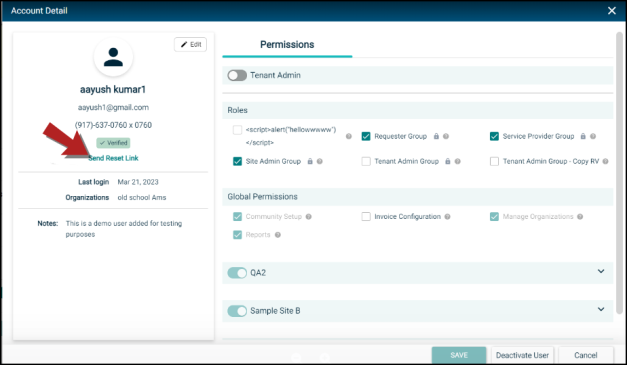
Click on Send Reset Link located below the Verified button.

-
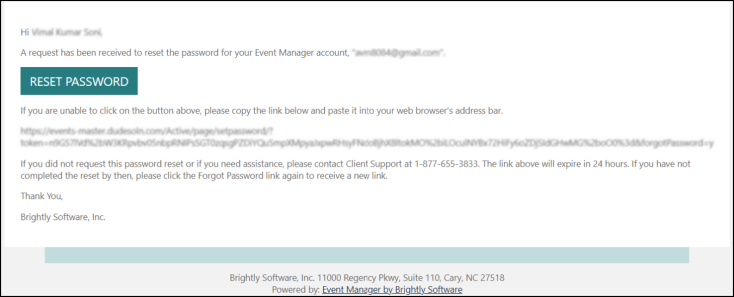
The user will receive an email with the reset password link. *Note: The reset link will be valid for 48 hours and will only work for Non-SSO registered users.
-
Alternatively, you can opt for two more ways to send a reset link.
-
Click on the ellipsis in the Actions column next to the corresponding user's name and click on Send Reset Link.
-
Click on the horizontal ellipsis next to the corresponding user's name.
-
Click View/Edit Account to open user profile card on the left side.
-
Click Send Reset Link located below the Verified button.
-
-
Permissions
The other section in the Account Detail form is Permissions. You can view the list of permissions granted to the users in this section. *Note: For now, you can learn more about permissions and how to edit permissions on the original Users page.
How to edit a user's permissions:
-
Move the Tenant Admin slider if you would like this user to have full access to all parts of the application with administrative privileges for all sites.
-
You can view the particular user's role groups from the Roles options, which are automatically selected based on their assigned roles.
-
Go to Global Permissions to enable more access to reports, community setup, invoice configuration, and managing organizations across all sites.
-
Click Save when you have made your changes.
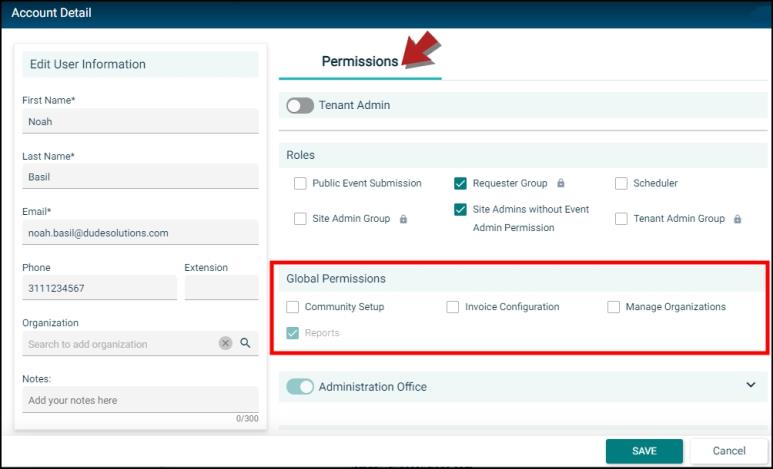
Global Permissions
Global Permissions is an exclusive set of permission types available only on this Users and Roles page and not the original Users page. If enabled, these permissions provide users with access across all sites in the tenant. *Note: This does not change how it was set up previously; it is only re-categorized and made obvious that it is a global permission rather than a site-specific permission. For example, users with access to the reports could access them on any site.
These are the four options available in Global Permissions:
- Community Setup
- Invoice Configuration
- Manage Organization
- Reports
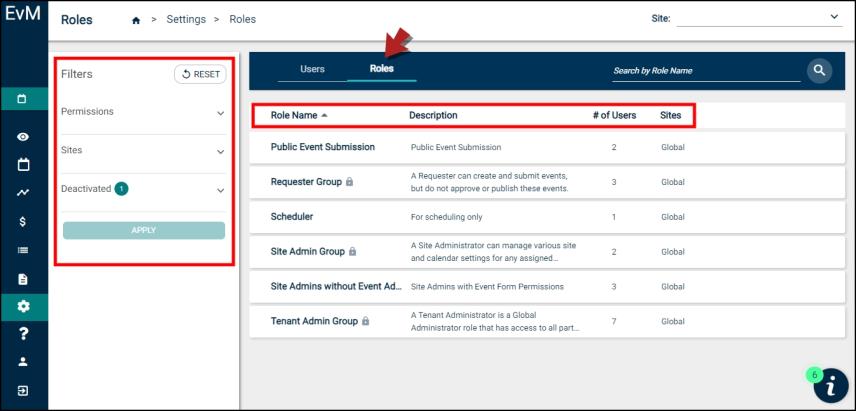
The Roles tab
The Roles tab gives you the ability to view and filter existing roles added to the tenant. Their registered roles reflect their permissions with the system. *Note: Currently, the Roles tab does not allow adding new roles. Go to the original Users page in Settings to add a new role to the user.
Default Roles
A role is associated with your access to applications and a combination of privileges that can also be applied to multiple users. Four default roles are available in Event Manager, which you can view in the Roles tab. *Note: These four default roles are also listed in the Users tab's Permissions section, as elucidated earlier.
-
A Tenant Administrator represents a Global Administrator role with access to all parts of the application, including events and site settings across all calendar sites within the Tenant account. A Tenant Admin can also force-approve events they edit from the events list. The Tenant Admin Group in this tab organizes all tenant administrators available.
-
A Site Administrator can manage various site and calendar settings for any assigned calendar sites, submit events, and approve events if they are added to the approval process. There are two site administrator groups, namely Site Admin Group and Site Admins without Event Admin Permission. *Note: The Users and Roles page is only accessible to Tenant and Site Administrators.
-
A Service Provider can add and manage tasks. They cannot, however, add or manage events, invoices, or anything else unless given additional roles or permissions. The Service Provider Group in this tab organizes all service providers available.
-
A Requester can create and submit events but not approve or publish them. The Requester Group in this tab organizes all requesters available.
The system default roles are created by the system and cannot be deleted, while custom roles are copied from the system default and can be edited or deleted.
Viewing Roles
-
Navigate these columns to view and filter information about the roles:
-
Role Name: This column displays the list of existing roles added to the tenant.
-
Description: This column describes what the role entails and its permissions.
-
# of Users: This column displays the number of users assigned to the roles.
-
Sites: This column displays the sites linked to the roles. *Note: The Roles tab allows you to easily distinguish between system default roles and custom roles copied from the system default if the Sites column shows Global, which means the role corresponding to it is either the system default or created to assign the role as a common pathway for all sites. You can learn more about site access on the original Users page.
-
-
Sort the roles using the arrow next to Role Name.
-
Use the Search and Filter options to find or show specific users:
-
Reset the filter menu from the previous use.
-
Use Permissions to search by permission type. You can select more than one option. It lets you choose all permissions from the Global Permissions section. *Note: You may use the No Permission filter type to see a list of roles without assigned privileges or the Tenant Admin filter type to view the list of roles with tenant admin access.
-
Narrows your search by user Sites. You can select more than one option.
-
You can use Deactivated to include or exclude deactivated roles in your search. You can also use this filter to find only deactivated roles. *Note: You are only able to view deactivated roles when this filter is selected.
-
Click Apply to populate your search.
-
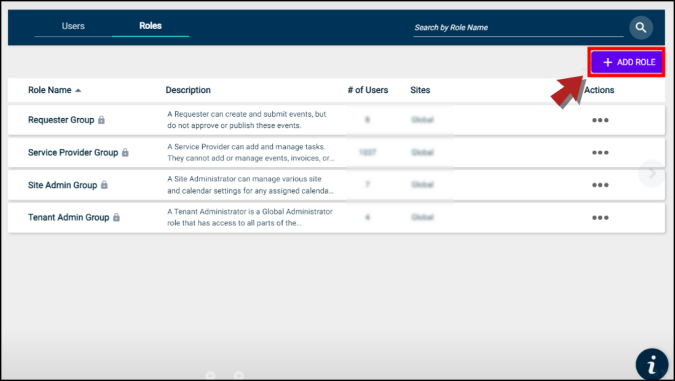
Adding a Role
-
Click on Settings in the left navigation panel.
-
In the Site Administration section, click on Users and Roles *New*.
-
Switch to the Roles tab.
-
Click on the Add Role button on the top right side.
-
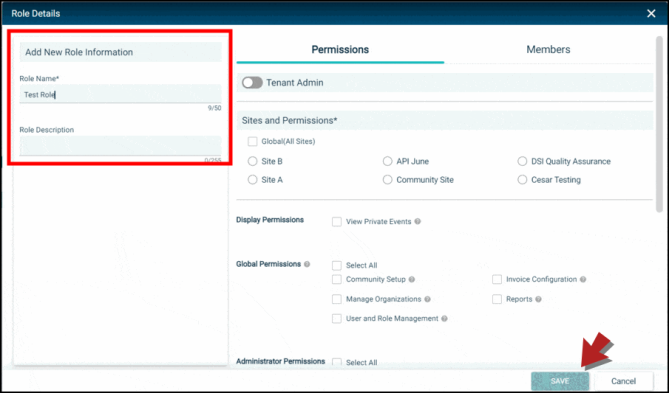
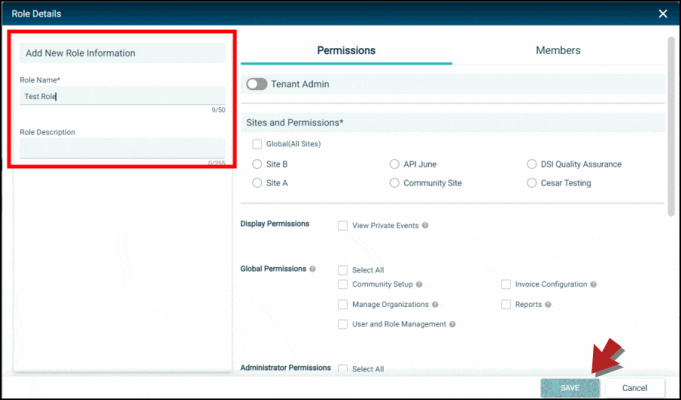
Fill out the following fields:
-
Role Name: Write the name for this role. For example, Requestor. *Note: This field is mandatory to create a role.
-
Role Description: These roles can be defined in three ways:
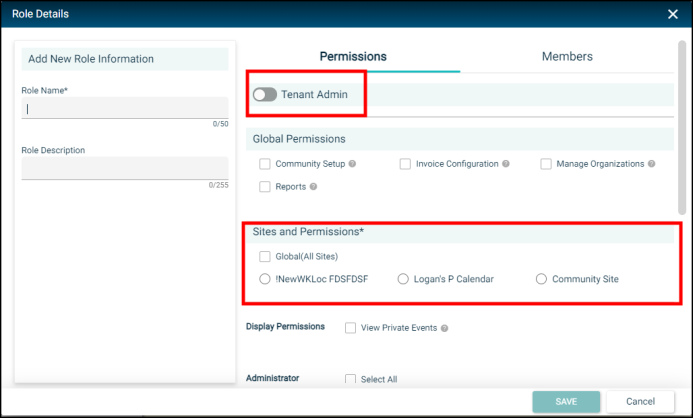
-
Enable Tenant Admin to allow complete access to all sites and grant all permissions.
-
Disable Tenant Admin, check the box next to Global, and go on to select permissions applicable on all sites.
-
Disable Tenant Admin and uncheck the box next to Global, and select at least one site and one permission to save this role.
-
-
-
After completing all the steps given above, click on Save to create this role.
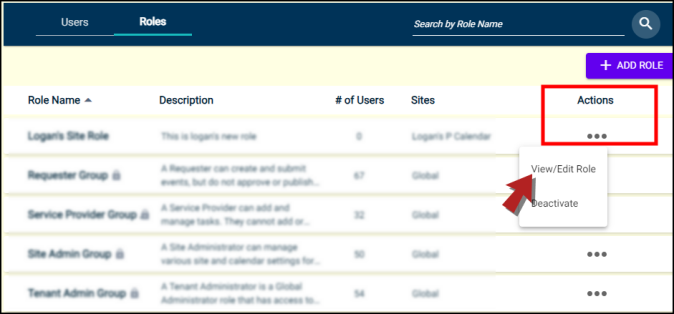
Editing a Role
-
Click on Settings in the left navigation panel.
-
Navigate to Users and Roles *New* in the Site Administration section.
-
Switch to the Roles tab.
-
Click on the horizontal ellipsis in the Actions column and select View/Edit Role.
-
You'll see the Role Details screen.
-
Go on to make required changes.
Role Information
You can edit information in the following fields:
-
Type in the name of the role in the Role Name field.
-
Write a short description of the role in 250 characters in the Role Description field.
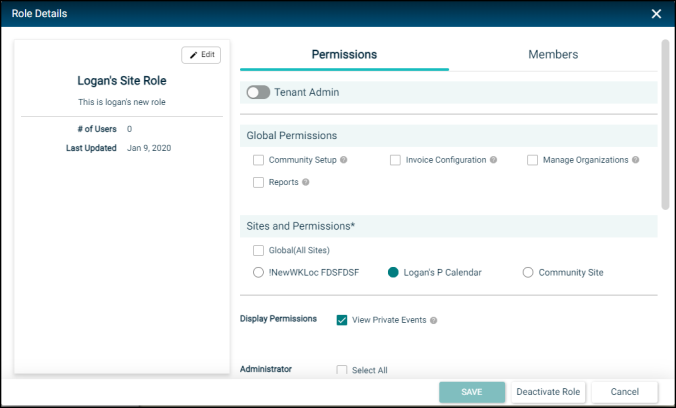
Sites and Permissions
There are two ways to edit sites and permissions for a role:
-
In the Sites and Permissions section, select a site to assign to the role.
-
Scroll down to assign required permissions to the user role for the selected site.
-
-
Enable the toggle next to the Tenant Admin to give the user role access across all sites. *Note: You must select at least one site and one permission while creating or editing a user role.
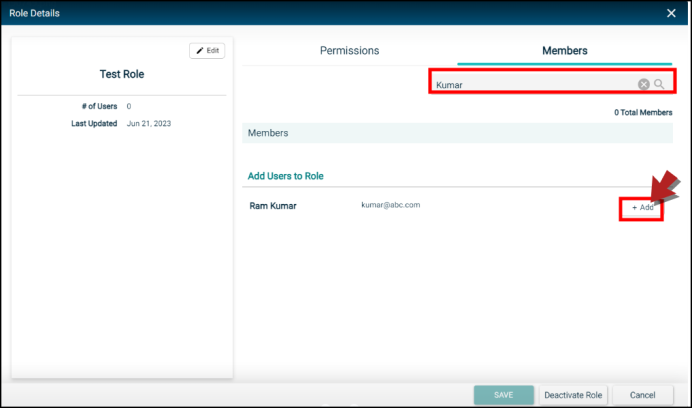
Members
-
On the Role Details screen, click on Members tab next to the Permissions tab.
-
Type in the name of the required user in the search box to add them as a member.
-
When the required user's name appears on screen, click on the Add button next to it.
-
Keep on adding members as required and click on Save when done.
-
You can search for users by names, phone number, extension, and email addresses.
-
You can search for users based on the filters you apply.
-
You can search users by email domain names and special characters.
Deactivating/Reactivating a Role
-
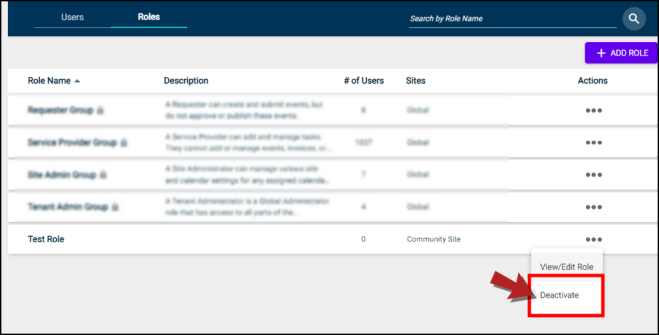
Navigate to the Roles landing page.
-
Deactivate: Click on the horizontal ellipsis in the Actions column and select Deactivate.
-
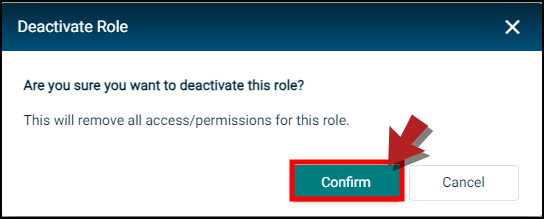
A dialogue box will appear on screen prompting you to confirm deactivation.
-
Click Confirm to deactivate role or Cancel to go back.
-
-
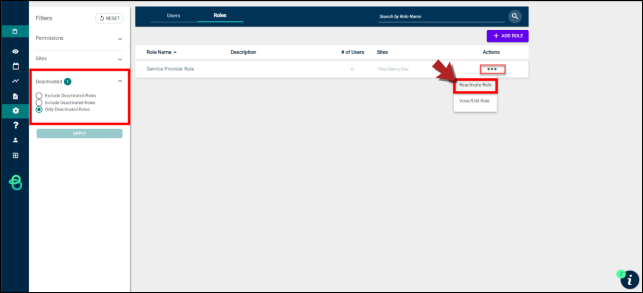
Reactivate: Select the filter Only Deactivated Roles from the left side to view a list of deactivated roles.
-
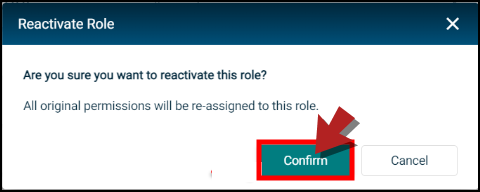
Click on the horizontal ellipsis in the Actions column next to the role you want to reactivate and select Reactivate.
-
Click Confirm in the dialogue box on screen to proceed with this action or Cancel to go back.
-
-
Please refer to our FAQs to learn more about this Beta Release. You can contact our Client Services team for further assistance.
